For this post we’re going to explore the basics of OTRS and how to start making configurations for specific use.
OTRS has 5 basic elements for its functionality. These are:
- Tickets: these are the main element of OTRS. A ticket is a request or problem that a customer makes or reports. They’re the mean on which customers interact with the people of the organization. All of the interactions are saved and archived.
- Queues: they are the holders of tickets. You can create as many queues as you’d like in order to assing tickets to queues according to business criteria.
- Groups: these are sets of permissions for the queues.
- Roles: this element is optional, yet I like to see it as mandatory. Roles are assigned to groups, so they’re as well a set of permissions. But what’s the difference? When you want to give permissions to an agent, you can either assign an agent to a group or to a role. The difference is that if you don’t have roles and want to change the permissions to a group of agents, you’ll have to change those permissions individually for each agent. If you have agents assigned to a role, you’ll just have to change their role to another one that has the permissions you need them to have.
- Agents: these are the people that login and attend all of the tickets, as well as the administrator of the system. Agents can also have multiple roles.
Getting started
Before we get started with creating all of the elements, please note that queues, roles and groups are dependent to your organization. This means that the elements I create in this post, shouldn’t be the same for your company and that before creating them, you should study your business’ processes in order to make an effective configuration of OTRS.
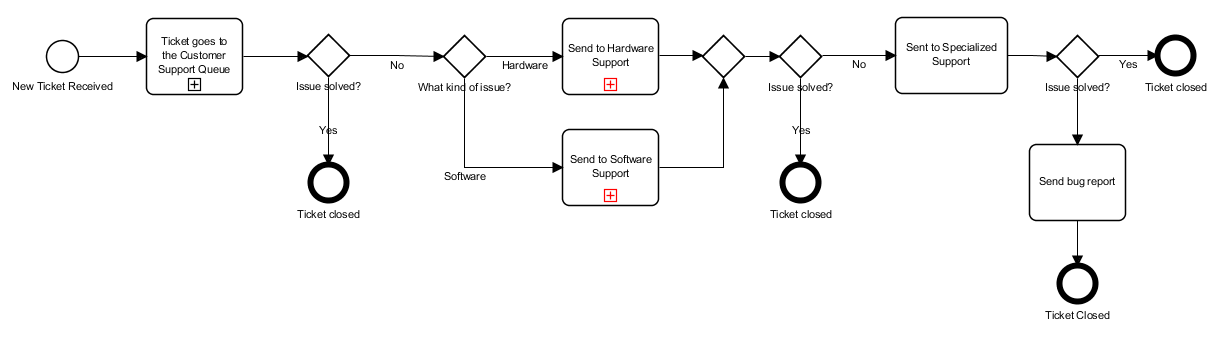
For this post I’m going to make up an organization that sells a electronic components with their own software. The basic structure would be something similar to this:

There’s the Customer Support Department, and the Development Department. There’s of course more roles like supervisers and all of that, but I just omitted them for this post’s scope.
The Customer Support Department, has 3 Customer Support Groups: the Customer Support group, the Hardware Support Group and the Software Support Group. The Customer Support will handle all the requests that customers have regarding everything (problems or simple questions). If they can’t solve it because it’s out of their knowledge reach, then, according to the problem (software or hardware) they elevate the issue to the support team that has more knowledge on the subject. If they can’t solve it, and this should be very in very few ocasions, they elevate the ticket to the Development Team and they should know how to resolve the issue; if they can’t resolve the issue, then they file a bug report.
Here’s a simple diagram for the process created using the BPMN notation (This is a interesting topic to check on. I’ll probably make a post about this later.):
After defining the process, let’s define the queues, groups and roles we’re going to use in OTRS, but first, let’s analyze the permissions available in OTRS. In the following picture, there’s a description for all of them:
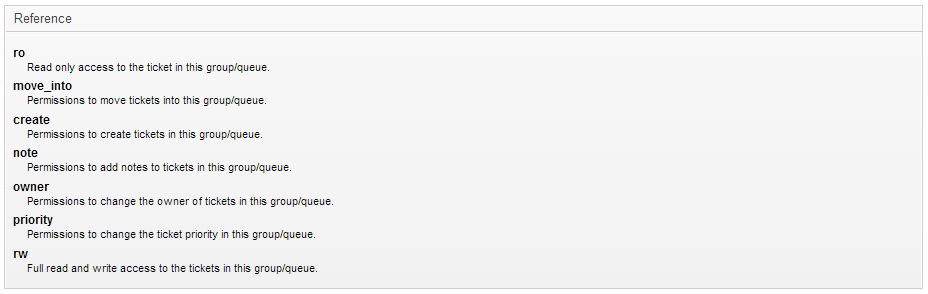
As you can see in the picture, the permissions are self-explanatory so I won’t get into details over this. For the post’s purpose, I’m going to define the permissions for each group and queue. For this we have to analyze the process flow and the organizational structure. In the structure, we defined 4 types of support, so there’s going to be a queue for each type of support.
After defining the queues, we have to define the groups of permissions for the different queues. I like to name it the same as the queue, on which it has major permissions. So, in this case we’re going to define 4 groups and 4 roles as well:
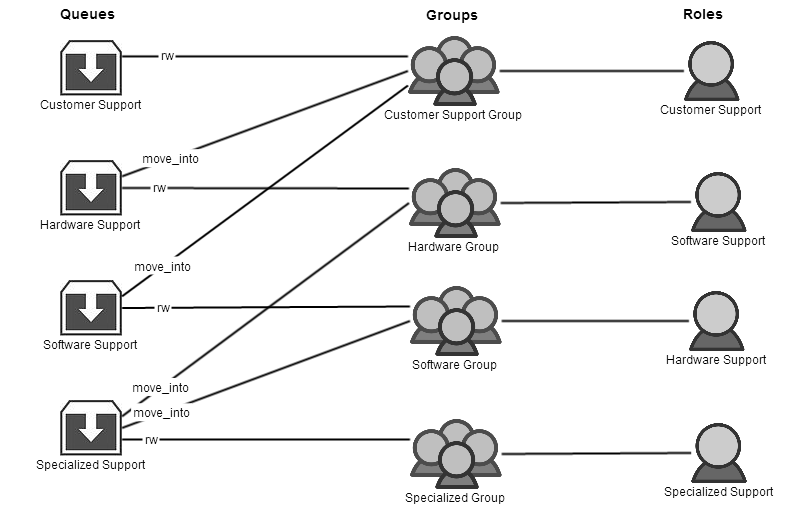
This is a very example of a Queue-Group-Role map. More effort should be put in order to define owners and limit the permissions even more, specially in big organizations, but for this post’s scope, this does the job.
Now that everything is defined, let’s see how to represent it in OTRS.
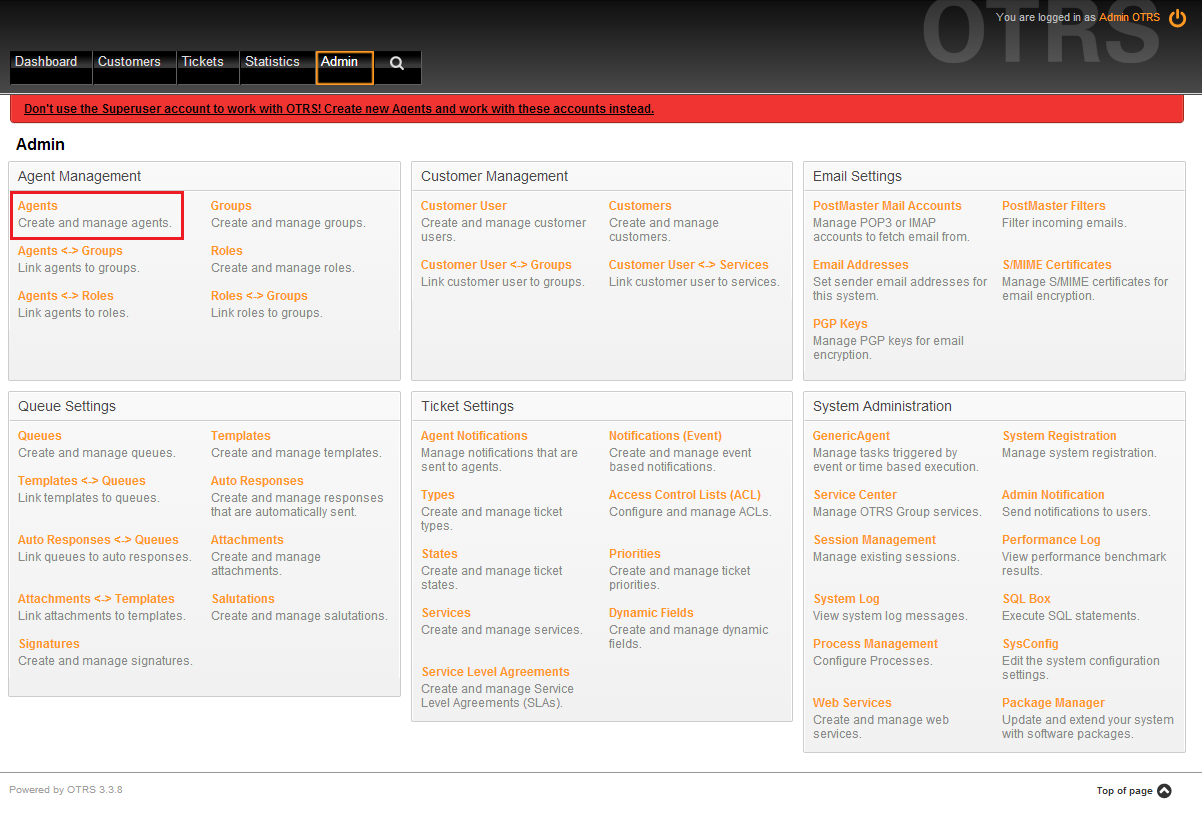
Step 1 – Login: login as an Admin user.
Step 2 – Administration View: Press the Admin button in the navigation bar.
Step 3 – Group Creation: In the Agent Management Panel, press the Groups button. This panel will be mentioned a lot in this post so don’t forget about it.
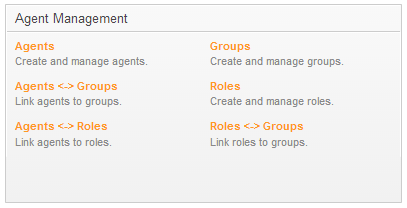
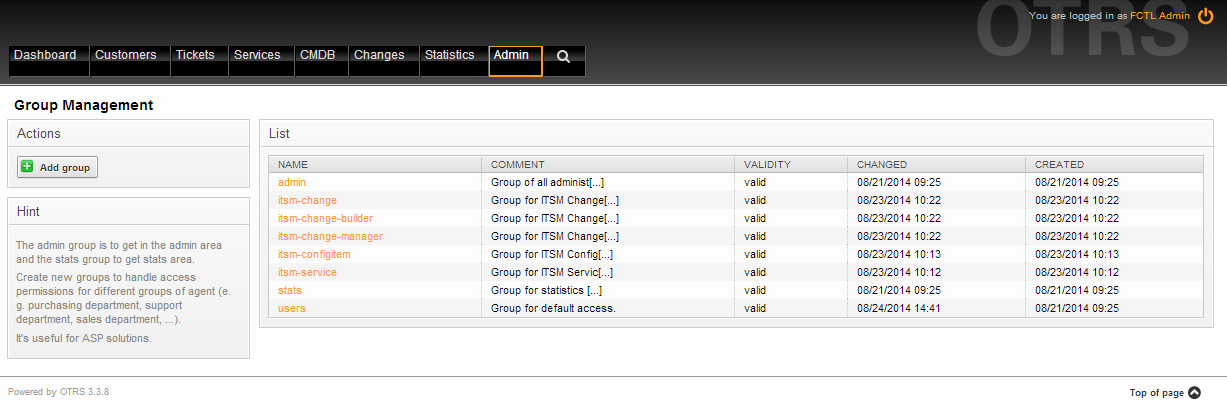
3.1 – New Group: In this page, you should see a list of all created groups. If this is a fresh installation, then you should see the users, admin and stats groups. If you have ITSM installed then you see some more. To create a new group, press the Add Group button in the Actions panel to the left.
3.2 – Filling Group Form: this is the form for creating a new group. It’s very straightforward. Go ahead and fill it with the information of your group. The Validity entry means if the group is valid or not. Groups can not be permanently deleted, so setting the Validity to Invalid would be the equivalent of deleting a group. After finishing press the Submit button.

3.3 – Agent-Group Relations: after creating a new group, you’ll be prompted with assigning new agents to groups. Leave it blank and then press submit.
![]()
This is everything you need to create a group. Repeat this process for all groups you defined.
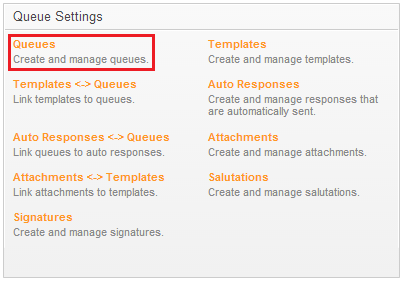
Step 4 – Queue Creation: go back to the Admin tab, and look for the Queue Settings Panel. Press the Queues button.
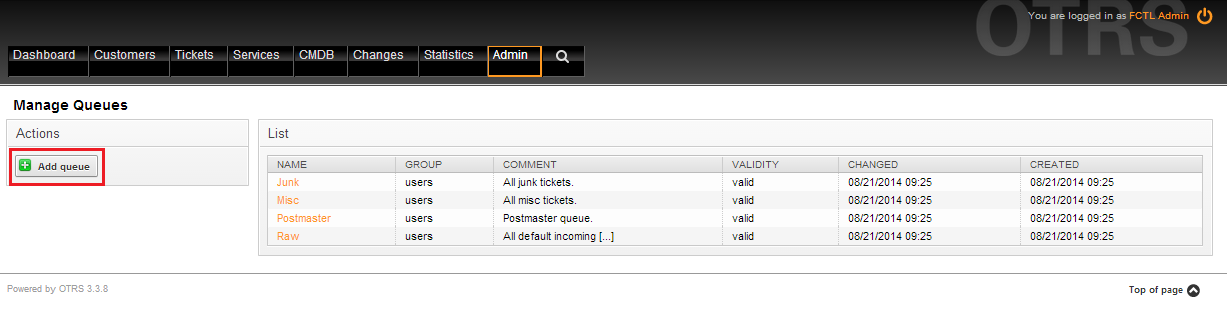
4.1 – New Queue: in this page, you should see a list of all queues. If this is a fresh installation, then you should see the Raw, Junk, Postmaster and Misk queues. To create a new queue, press the Add Queue button in the Actions panel to the left.
4.2 – Filling Queue Form: this is the form for creating a new queue. It’s very straightforward. Go ahead and fill it with the information of your queue. The Validity entry means if the queue is valid or not. Queues can not be permanently deleted, so setting the Validity to Invalid would be the equivalent of deleting a queue. Note that there is a Group field and a Subqueue field. The Group field will be the default group for the queue, so make sure you choose the correct group and the Subqueue field is the parent queue of the new queue. You can leave this field blank.
Other important fields are the Salutation and Signature fields. In OTRS you define templates so that every tickets has certain structure and standarization. In this fields, you choose the template for the Salutation and Signature. In this example we’ll use the default one. In a later post I’m going to write about making new templates.
Press Submit after you’re done filling the form.
4.3 – Template-Relations: after hitting the Submit button, you’ll be redirected to a Template-Queue page. In this page you define the answer templates associated to the queue. You can have predefined answers to known problems or questions. You need to have at least one associated template to a queue in order to define tickets. Make sure you choose at least one.
Then hit the Submit button.
![]()
This is everything you need to create a queue. Repeat this process for all queues you defined.
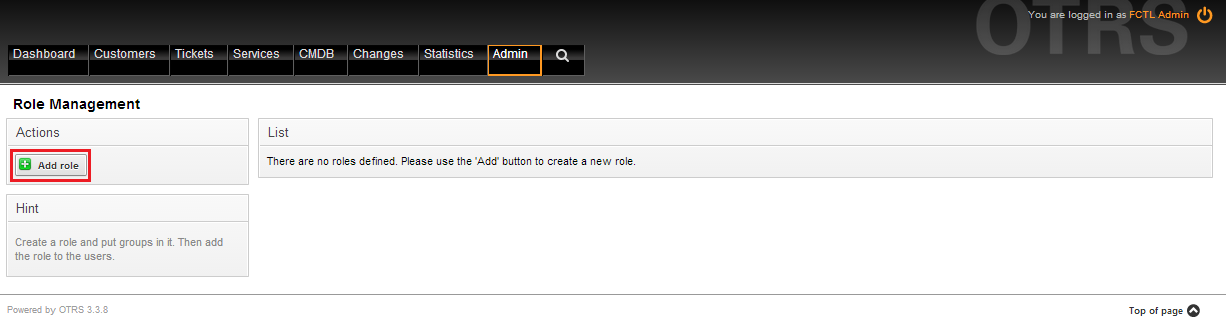
Step 5 – Role Creation: go back to the Admin tab, and in the Agent Management panel press the Roles button.
5.1 – New Role: in this page, you should see a list of all roles. If this is a fresh installation, then you should see no roles created. To create a new role, press the Add Role button in the Actions panel to the left.
5.2 – Filling Role Form: this is the form for creating a new role. It’s very straightforward. Go ahead and fill it with the information of your queue. The Validity entry means if the role is valid or not. Roles can not be permanently deleted, so setting the Validity to Invalid would be the equivalent of deleting a role. After finishing press the Submit button.
Step 6 – Role-Group association: go back to the Admin tab and press the Roles <-> Groups button in the Agent Management panel. This will redirect you to the following page:
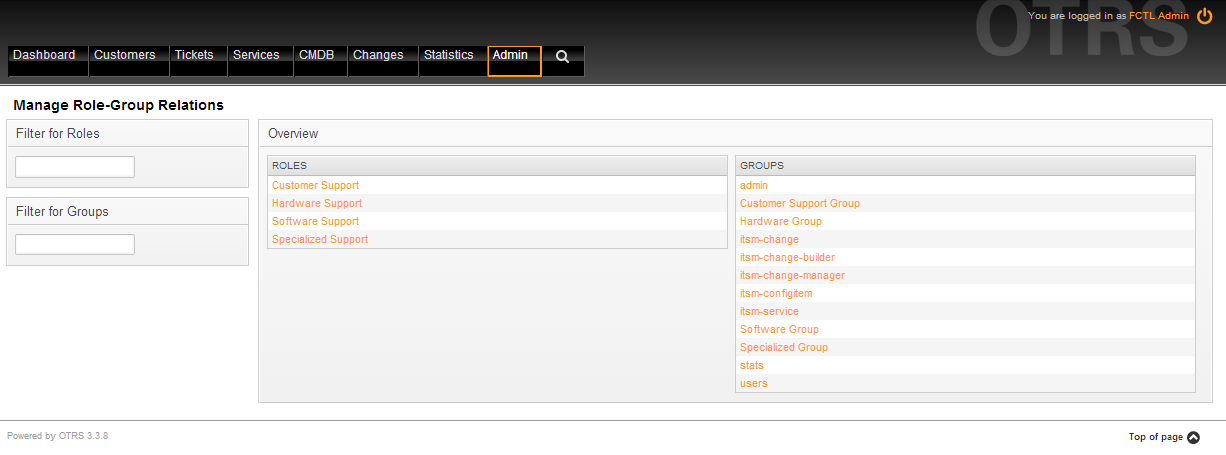
Click one of the roles you created.
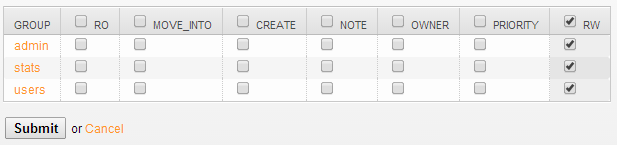
6.1 – Permissions: to assign the permissions you defined, you’ll see the following view:
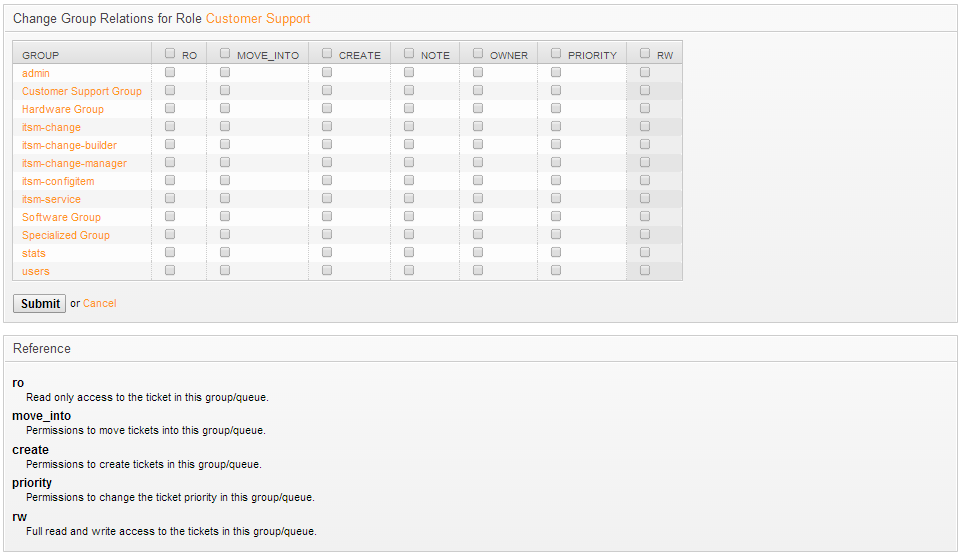
Check the permissions according to what you defined and press Submit.

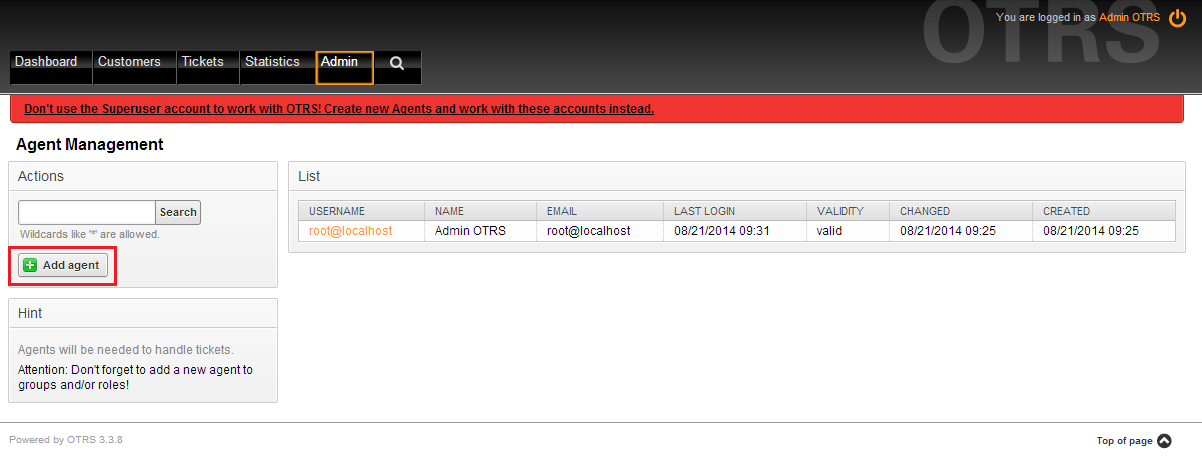
Step 7 – Agent Creation: go back to the Admin tab, and in the Agent Management panel press the Agents button.
7.1 – New Agent: in this page, you should see a list of all agents. If this is a fresh installation, then you should see root@localhost and the admin user if you created one. To create a new agent press the Add Agent button in the Actions panel to the left.
7.2 – Filling Agent Form: this is the form for creating a new agent. It’s very straightforward. Go ahead and fill it with the information of your agent. After finishing press the Submit button.
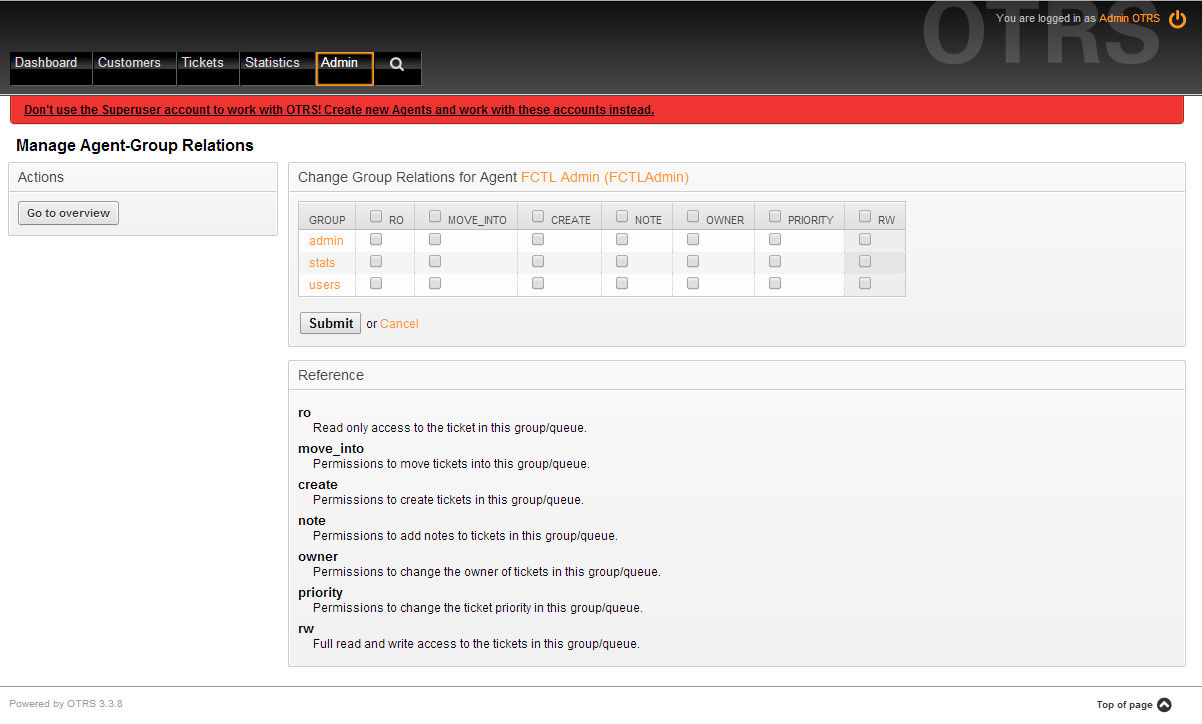
7.3 – Agent-Group Relations: after creating a new agent, you’ll be prompted with assigning the agent to groups. Leave it blank and then press submit.
Step 8 – Role-Agent association: go back to the Admin tab and press the Agents <-> Roles button in the Agent Management panel. This will redirect you to the following page:
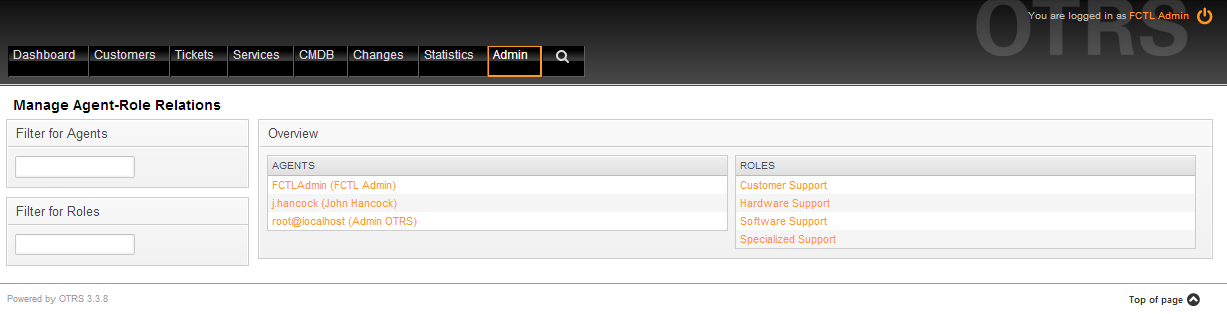
Click one of the agents you created.
8.1 – Role: to assign a role you defined to the agent you selected, you’ll see the following view:
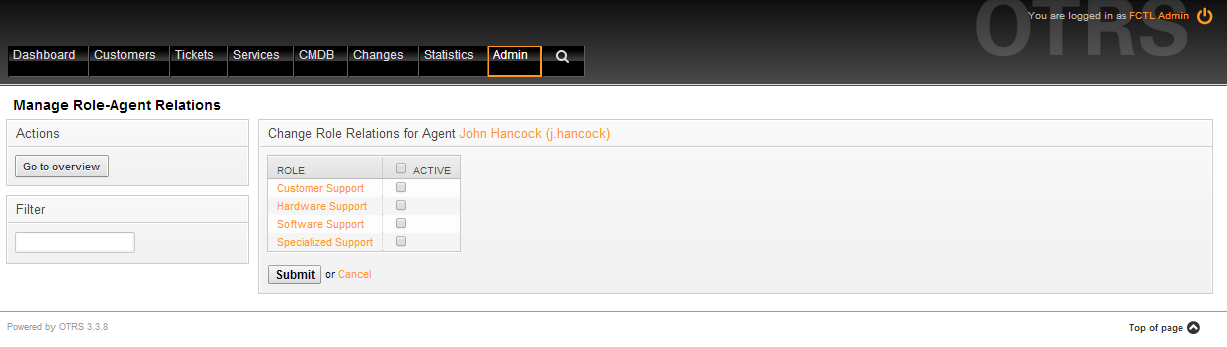
Check the roles according to the agent you selected and press Submit.

Your agent now has role(s), and therefore permissions to the queues you associated the role with.
This is it for the queue, group, role and agent creation. Repeat all of the processes in order to make all the queues, groups, roles and agents you defined for your organization. I hope this helped you understand a little bit better the basics of OTRS.
See you in the next post!