OTRS Windows installation

Featured

For my first actual post, I’m going to make a tutorial on how to install OTRS in Windows. Linux installation tutorial will most likely come in the future.

About OTRS

OTRS is an Open Source Ticket Request System. This kind of software is great for handling trouble tickets of every kind within or outside an organization. You can see tickets as requests from internal collaborators such as employers of a department asking for air conditioning maintenance to the maintenance department, or a customer that asks for support or making a complain.

What the system allows is to manage all this incoming requests in different categories (queues in OTRS) and it also makes it possible a complete tracking of the tickets. A person can see all the communication necessary for resolving a ticket, it’s state, it’s owner and responsible and every possible information you can imagine. The system also permits for the administrator to create roles and responsibilities to different queues and the hability to assign agents to those roles. This allows administrators to mantain the information secure and visible only to the people that are meant to see that information.

Another feature of OTRS is that it is highly customizable as it is Open Source and configurable as well. There are lots and lots of options varying from telling the system what fields of tickets to show and which ones to hide; to customizing the GUI to create filters for incoming mail from customers to automatically assign to a queue or just delete them if they’re spam.

There is also an option for adding third-party modules, such as ITSM (Information Technology Service Management) module meant to aid in ITSM activities and processes. This module is ITIL (Information Technology Infrastructure Library) certified and I’ll talk about it more later in this post.

OTRS Windows Installation with PostgreSQL

Installing OTRS in Windows is actually very simple, as you would expect in a Windows environment. Here’s a step by step guide:

Step 1 – Download OTRS: go to this link, look for the Windows Installer and download it.

Step 2 – Install OTRS: go to the directory where OTRS installer was downloaded and execute it.

2.1 – Choosing installation language: choose the installation language you feel more comfortable with. This language will not be the final installation language. Hit Ok and then press Next.

2.2 – Choosing Perl version: OTRS is written in Perl and you can choose whether using ActiveState Perl or the bundled version of Perl. I tried installing it with ActiveState since the installer said it has a better performance than the bundled one, but I run into some issues which I could not resolve, so for this tutorial i’ll be using the bundled version. This said, hit Next to continue with the installation.

2.3 – Destination Folder: choose the folder where you want to install OTRS and hit Next.

2.4 – Database Selection: this is an important step. For this tutorial we’re going to use an already installed version of PostgreSQL, so I’m going to choose Use an already  installed databse option. If you don’t have PostgreSQL you can install it if you want to, but it’s not necessary. You can choose the Install the bundled MySQL database option with no negative impact with the installation. Going this way is very straightforward and less complicated so choose what suits you best. Hit Next and then Install to continue.

2.5 – Installation: OTRS is now installing and wait a few minutes. After it’s finished hit Launch to continue.

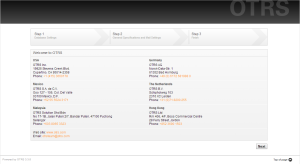
Step 3 – OTRS Initial Configuration: after hitting Launch button a new window will open in your default browser with a look similar to this:

1

Hit the Next button and continue.

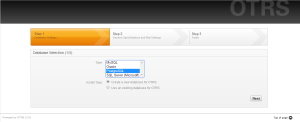
3.1 – Database Selection: in this step you’re going to select the database engine you have installed.

Note: if you chose to install with the bundled MySQL database these steps will be slightly different for you. From Step 3.3 everything should be the same again.

In this case, I’m going to choose PostgreSQL and the option Create a new database for OTRS and then hit Next.

2

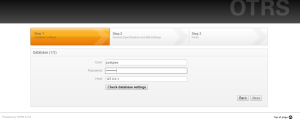
3.2 – Connection Settings: in this step, OTRS is going to ask for your database user credentials and the host of the connection. Make sure you put the credentials of a user with CREATE DATABASE permissions and then hit Check Database Settings.

3

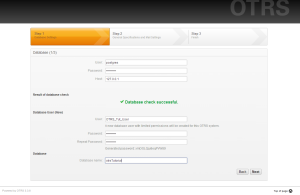
If the connection was successful you’ll get a new set of fields. These correspond to the database that OTRS will be using, so feel free to change them however you want. For this post’s purpose I’m going to be using otrsTutorial for the database and OTRS_Tut_User for the master user. Make sure you change the password to something you are more likely to remember or take note on the auto-generated password and then hit Next. This step might take a little while since the database will now be created.

4

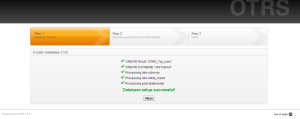
After the database was succesfully configured, you’ll get this window:

5

Hit Next to continue.

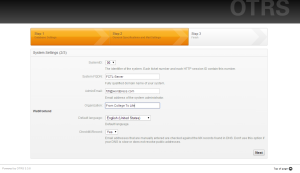
3.3 – General settings: in this step you’ll be asked for some information.

6

SystemID: just change it to whatever you like best, but if you have multiple installations it’s better for them to be different.

System FQDN: put the name the domain name of the system you’re installing OTRS. It is generally filled by default.

AdminEmail: fill it with the administrator email.

Organization: put the name of your organization.

Default language: this will be the default language. This does not change the administrator’s frontend language automatically. We’re going to change that later in this post.

CheckMXRecord: this has to do with mail redirection. Choose No if your DNS server is slow.

Hit Next to continue.

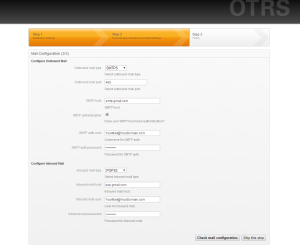
3.4 – Email Settings: this is the last step of the installation. In here you’ll configure the email the system is going to be using. For this tutorial I’m going to use Gmail SMTP and POP hosting. The image will be self explanatory on how the configuration should be.

7

Outbound and Inbound mail type and host should stay the same as well as the port if you’re using Gmail, so don’t change them unless you’re completely certain of what you’re doing. For the user authentication, make sure you put your entire mail address, even if it ends with @gmail.com. 

If you’re using another mail host, make sure you follow their instructions on how POP and SMTP configuration should be in order to work.

Once you’re done with that, hit the Check mail configuration button to check the configuration is correct. It if is correct you’ll advance the installation automatically.

Step 4 – Admin configuration: you’ll now be prompted with a Finished view. Go the Start page link it shows and login with the root@localhost user and the generated password.

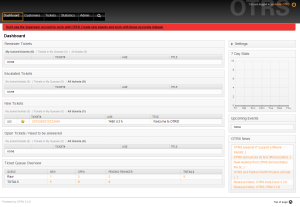
4.1 – Login successful: one you’re logged in. You’ll see this window:

8

This is the main view of OTRS. Here you can see information about tickets, but we’re get into that later. For now, focus on the red message. To avoid this message, we’re going to make a new user with Admin privileges.

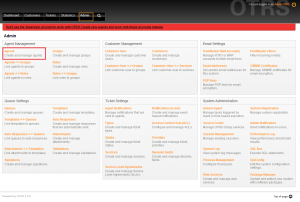
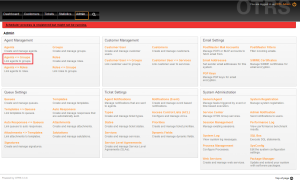
4.2 – Creating new Admin user: press the Admin button in the upper left side of the screen. You’ll get redirected to the Admin panel. In here, press the Agents button as shown below.

9.1

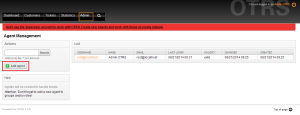
You’ll now see this view. Hit the Add agent button:

10

You’ll now be prompted with a form. It’s a bit long so I won’t post a picture, but the basics are simple. Fill the user with the information you consider necessary, but make sure to fill every field with a *, since they’re a must. In here you can set the language of the user’s GUI. The user can later change this if he desires. There’s a bunch of important information you can put in here so make sure you take your time to analyze all of this fields and see what is relevant to fill for your organization. After you’re done hit Submit. 

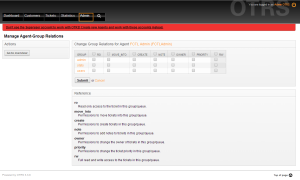
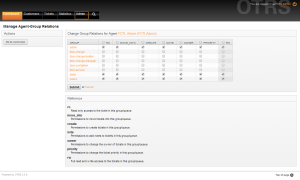
4.3 – Group Relations: after the agent is created, you’ll be prompted with this window:

11

This group relations might look confusing, but we’ll get into more details in another post. To grant all permissions to the new user, check the top RW box. the table should now look like this:

12

Hit the Submit button to finish. Afer this you’ll be redirected to the agents view and you whould see your new user there.

4.4 – Changing root password: to get to the current user management view, go to the upper right corner and hit the name of the user. In this case it’s Admin OTRS since we’re using the Superuser. 

13

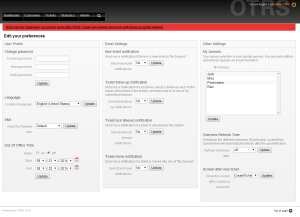
This will open the following view:

14

Here you can change the password by putting your Current password and the New password, and then pressing Update.

Also, you can change the language, the skin, office schedule, notifications and some other settings. Make sure to explore this panel to see if there’s something of value for your organization.

Step 5 – Logging out: after changing password, you might want to now login with your new Admin user. To Logout press icon next to Admin OTRS label in the upper right corner.

15

This will prompt you to the Login page and you can now login with your credentials.

And we’re done! This is everything for OTRS basic installation in Windows using an external database.

My next post is going to be about installing the ITSM module.

Reference for the Gmail configuration:  http://wiki.otterhub.org/index.php?title=Configure_OTRS_with_Gmail
Brief experience with Inception Workshops

So, I’ve made it to almost 6 weeks of the apprenticeship here at Pernix. I’ve gotta say, it’s been quite an awesome experience in lots of aspects, such as technical knowledge, real-life experience and learning about the process of creating a new project.

For this post, I’m going to make an emphasis on the last point, because I was involved in the requirements recopilation for a project the business is about to start. I was first approached by the coordinator of Pernix and asked me if I knew what Inception Workshops were. I answered no, I didn’t know what they were, honestly, so he told me he was going to send me an email with a book about it. But that wasn’t everything. He then told me that a friend of his needed help with a new idea he had, and that me and another colleague were going to receive him and recopilate all the requirements by making an inception workshop. The coordinator told me that this meeting would take place in two days and that it would be very important for me to have the book read by then.

I was a bit anxious because I couldn’t just go to the inception without knowing what it was about and because, unfortunately, I have never been much of a reader, but that’s something I’ve been trying to fix. Reading is great, it opens your mind to lots of new and different things and it also helps you relax and forget about other things. But that’s not really the point here. Sorry for that. The point is that I had to read a book in less than two days and I thought it was a huge book. When I sat down and started reading, I noticed it wasn’t very long and the best thing was, I got really interested. Inception workshops are the “agile way” of recopilating requirements for new projects, but it goes a little bit further than that.

Generally, requirements recopilation is done with a couple of analysts and the stakeholders that need the software. During Inception Workshops, the effort goes a little bit longer since both parties get together in a special environment and the gathering is made with both analysts and developers from the development team and stakeholders and users of the contracting team. Why is this helpful and better than the traditional way? Because much more points of view are taken into consideration, specially the user point of view, and mostly because it helps all of the involved people determine the why of the project.

To explain what these workshops are about, I’ll be using Enrique Comba’s book about Inception workshops as reference. They are a set of acitivities designed to help the users and stakeholders define the idea better (specially if they don’t have it 100% clear) and to also shape it to be a much more realistic one by taking into consideration the developers’ point of view and budget restrictions. They’re also useful to make the contracting and development team bond, to help the developer team decide if it’s a good idea to embark into the project and to determine difficulties the project may have.

A complete Inception Workshop consists of two full days filled with activities for the people involved in the project, but the actual duration of the workshop may vary. Very long projects may require the inception to be a little bit longer, while small projects probably need less than two days.

As I mentioned before, Inception Workshops are composed of activities. But before I get into that topic, I’ll explain a little bit about factors that may seem a bit irrelevant, but that have actually a big impact on the quality of the inception.

The first factor is the place. It should be large enough for participants to fit easily without crowding the place. The idea of a good place is for people to be comfortable enough to be concentrated and creative. If the place is small and it gets crowded, people may get annoyed without enough space, thus limiting their productivity and creative outcome. Another aspect of the place is the lightning. Comba says that if the room has no natural light, chances are people will get tired quicker. Something else, and this caught my attention a lot when I read it, is the height of the ceiling. The kind of ceiling is determined by whatever is needed. If people need to concentrate, it’s better for a small ceiling, but if people need to be creative, it’s better to have a high ceiling or going outdoors if possible. There’s a lot more aspects to take into consideration such as how to use the walls of the room, how to sit the team, among others.

The second factor is the moderator or facilitator of the inception. A big group of people hardly will control itself, so someone is needed to moderate and control the activity. This means he or she holds lots of responsibility for making the inception workshop successful. This person must not express his point of view towards the project to the team, he must set an environment where everyone can share their thoughts and to control those people who talk too much. Another aspect he’s responsible of, is explaining the activities to the group and he must control time so the workshop doesn’t take much longer than what it was expected to last.

Now that these two aspects are clear, I can now explain what activities inceptions tend to have. Why did I write tend instead of must? Because they may vary. Not all inceptions must be the same or follow the same flow. Some activities can be left out in order to focus more on other activities that are considered more relevant or to shorten the time of the inception.

Comba lists the typical inception workshop as follows:

Day One

Who is in the room? 30 minutes
The Rules of the Game 30 minutes
Why are we here? 15 minutes
Create an Elevator Pitch 20 minutes
Create a Product Box 1 hour
Create a Not list 40 minutes
Meet your Community 1 hour
What keeps you awake at night 2 hours

Day Two

Show the solution 4 hours
What’s going to give 1 hour
What’s going to take 1 hour
Wrap up 15 minutes

That’s a lot of activities, right? I thought so the first time I saw it, but they all have a purpose and help everyone understanding everything better. You will see the logic of everything and see why they’re all necessary by getting into details for every one of them.

Who is in the room

This activity is almost self-explanatory. It’s the first activity and every person takes some time to introduce themselves. You could take different approaches for this activity, but I liked a lot the way Comba explains it in his book. He recommends that everyone should get together in pairs. Then, each person has to interview his pair to get his name, his contact information, his likes, dislikes and then draw a picture of the other person. They should write all of this down in a piece of paper. After everyone is done interviewing, they should present to the rest of the group the person they interviewed. When the presentations are over, take all of the papers and post them on the wall so everyone can see them.

Rules of the game

The purpose of this activity is to create a set of rules in order for the team to follow them and be more creative. Please note that this activity is not for the moderator to present the rules, on the contrary. The whole idea is for the entire team to define the rules. This is because they’re more prone to follow them when they created and agreed to them. So, to define them, Comba recommends making groups of four, so they can discuss the rules between themselves and then the whole group discusses them and votes on them. The facilitator can also help recommend rules based on his or her experience.

Why are we here?

As I mentioned before, one of the advantages of making an Inception Workshop is to get a better insight on the why of the project. The poing of this activity is that the customer explains the idea or the global vision of the project. It’s advised to have a Questions & Answers time after the explanation.

Elevator pitch

When I first saw the name of this activity I said to myself: “What is an elevator pitch?” Since I’m not a native english speaker, I tried to translate the term, but the literal translation made no sense whatsoever. Even now I can’t think of an accurate translation for this. So, what is an elevator pitch? An elevator pitch is a very quick but informative enough speech (one that you would give on an elevator trip) about the project. It now makes sense, right?

In order to make the perfect elevator pitch for your project, start by handing a template of how the elevator pitch should be. Comba’s template is the following:

For ... target customer
who ... statement of need/opportunity
the ... product name
is a ... product category
that ... key benefit, compelling reason to buy.
Unlike ... primary competitive alternative.
our product ... statement of primary differentiation

Tell the group to make groups of 4 and then tell them to create their version of the elevator pitch. When everyone is done, every group should present their version of the pitch to the rest of the group and then discuss each one’s strong and weak points. After this, the entire group should create the final elevator pitch.

Design a product box

In this activity, the group is going to create a product box for the product, a slogan and some benefits, in groups of no more than four. Once they’re done, everyone has to present their version to the group. After this, discuss the findings of the activity. This activity helps the group to highlight the benefits of the project or idea.

Create a NOT list

This a fundamental activity. When someone has a new idea, it’s very easy to start adding and adding features. This is not only unrealistic, but the scope gets out of hands. This activity focuses on analyzing all of these ideas and features and defining whether they’re in or out of the scope of the final project. A good approach to do this is by pasting post-its with the feature in a wall space that indicate if they’re in or out of the scope. Then you should discuss the findings and talk about how they change the direction of the project.

Meet your community

When creating a new project, lots of people will be involved, directly or indirectly. Knowing who these people are, how they get affected and how could they impact the project is crucial to achieve success in the project. This activity is about creating user persona documents that describe the characteristics of those people involved. This is achieved again in groups, and the groups should describe the people’s needs and desires of the community involved in the project or idea. Once this is done, they should present it to the rest of the group and then discuss the findings.

What keeps you up at night

It is no secret that every project or new idea has risks. We all know they’re always there, but sometimes don’t want to talk about it. Nevertheless, that’s something necessary and important to talk about and discuss. In this activity every person is going to write down their fears in a piece of paper or post-its, in order to paste them in the wall later. Once everyone is done, discuss about the fears the group has. It’s important to talk about their impact, their importance and how to mitigate or avoid that problem.

Show the solution

This is one big activity, that is split into 4 activities. The first one is Give your app some personalityThis is a fun activity because the group is going to treat the project as if it were a person. Will the app look crazy and colorful like a clown or will it be simple and elegant? In here you’ll define the most important attributes of the project or application that characterize it.

The other activity is Let’s make it flow. In here the whole group is going to define how will the users interact with the app (application flow and not screen designs). For this task, group’s won’t be made and everyone is going to participate on deciding the flow.

The next activity is Wireframing. In this activity the group is going to create sketches for some of the screens of the application. This should be made in pairs.

The last activity is Story mapping. For this activity the group is going to define some features they envision for the product. Then, these features will be mapped to the flow and see how they relate to each other. Once all features are defined, the group will define the order of implementation of the stories in a story map.

What’s going to give

Every project requires dedication and compromise. In this activity, the group makes sure that everyone involved is on board for the project and all the responsibility that it implies. For this, the group is going to define which constraints (scope, budget, time, ease of use, quality) are more important from 1 to 5. 

What’s going to take

At this stage, the inception is almost over, but there are still some loose ends to tie. These are: the developing team, the decision-maker, the price and the time it will take to develop the project. The group will discuss and decide all of this together.

Wrap up

This is a summary of everything that happened in the inception, everything you discussed and decided together. Also it’s a great moment to explain the group what is going to happen next.

My experience

As you saw, Inception Workshops are pretty extensive and they look very cool. The set of activities really helps the project stakeholders and developers to get a clearer view of the project, thus making a better product and achieving better results. Even though it’s almost impossible to make an inception workshop for every project, some approaches can be used for smaller gatherings with new clients.

My experience was exactly that. I didn’t went to a big two-day inception workshop, but we made a small one with some essential actvities shown here. It was the first time I get involved into a real-life software project and I was really happy about that. My career choice emphasizes in this kind of activities rather than actual development, so it was a very important experience for my professional carreer. In my opinion, I think I did good during the workshop, and it helped both us (developing team) and customer to understand the idea better and to define the scope of the project. On top of that, the idea is really innovative and very helpful for lots of people. I have very high expectations of this project and I know that the team will make it an amazing success.

Another thing I liked about this topic, is that if you sit down and analyze day one as shown in this post, it has almost nothing to do with computers directly. This means that those activities can be used for almost every project of any kind. Doing that would help the group to get a clearer picture of the idea and the project and the technical activities for that area can be done easier.

If you liked this post and got interested into the Inception Workshops, I really recommend buying Enrique Comba’s book Inceptions Starting a Software Project. You can find it here. It’s definitely worth the money.

I’m going to end this post with this quote about project management that relates to the workshops. By not making a workshop, a development team might not understand the idea clearly and that may lead to failure.

No matter how good the team or how efficient the methodology, if we’re not solving the right problem, the project fails. 

Woody Williams

OTRS Change GUI look, language and translate language packages

To continue with the OTRS posts, a basic one should be on how to change the language of the user interface. This is a very simple task to achieve, but it’s still an important one. We’re also going to see how to update the language packages because they tend to be incomplete, so it’s not a bad idea to translate some of the texts that are not yet translated.

GUI language and look

Step 1 – Login: login with your user.

Step 2 – Settings: go to the settings page, by pressing your user name on the upper right corner.

2.0.0

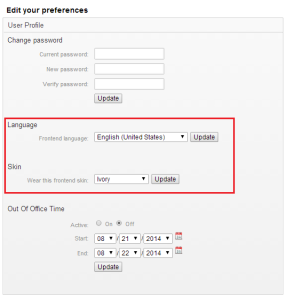
Step 3 – Edit preferences: in the User Profile panel, you’ll see the Language and Skin options.

3.0.0


3.1 – Languate Selection: below the Language option, select the language of your preference. For this post I’m going to choose Spanish.

3.1.0

3.2 – Skin Selection: below the Skin option, select the skin you want to use. The differences between Ivory and Default is the color. The Defaut’s skin main color is orange, while the Ivory one is light blue. Besides the Default and Ivory skin options, you get the Slim option for both skins. The difference is that the Slim option makes the navigation bar a little bit smaller.

For this post, I’m going to choose Ivory (Slim). 

3.2.0

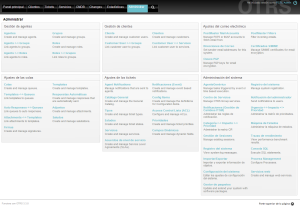
Press Update to update the skin. Your GUI should now look different from what it previously looked. This is a screenshot for the Admin tab with the Ivory Slim skin and in spanish language.

3.2.1


This is everything for the language and GUI modifications. We’ll now continue with how to translate language packages.

Language package translation

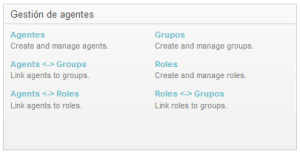
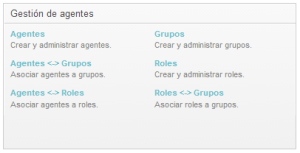
As you can see in the last picture, not all text is in spanish. To correct this, let’s focus the Gestión de agentes panel for translation.

4.0.0

Step 1 – Text to translate: make a mental copy of the text you want to translate. Text can’t be copied in this particular place because everything is a button. In this case, I’m going to translate:

"Create and manage agents." => "Crear y administrar agentes."
"Create and manage groups." => "Crear y administrar grupos."
"Agents <-> Groups" => "Agentes Grupos"
"Link agents to groups." => "Asociar agentes a grupos."
"Create and manage roles." => "Crear y administrar roles."
"Agents <-> Roles" => "Agentes Roles"
"Link agents to roles." => "Asociar agentes a roles."
"Link roles to groups." => "Asociar roles a grupos."

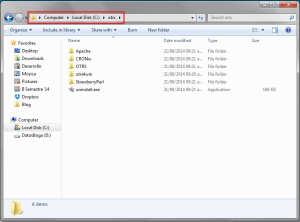
Step 2 – OTRS directory: go to your OTRS installation directory, it’s generally in “C:\otrs”.

4.1.1

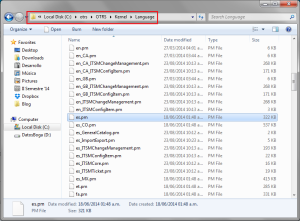
Step 3 – Language directory: go to “%YourOTRSInstallation%\OTRS\Kernel\Language”. In this directory you’ll see a bunch of .pm files. Look for the one you picked in the language selection. These files are named after the ISO 639-1 language coding, so check this link for your language’s code. In this post we’re going to look for es.pm file.

4.2.1

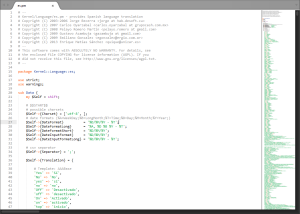
Step 4 – Open file: open the .pm file with your favorite text editor. For this post, I’m going to use Sublime Text 3, but feel free to use whatever text editor you want.

4.3.1

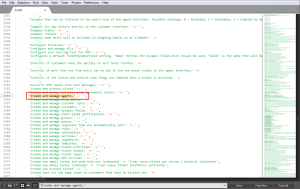
Step 5 – Find the text: press Ctrl-F paste the text you want to translate and press enter.

4.4.1

Step 6 – Translate: as you can see in the screenshot below, there’s no text after “=>”. This means there is no translation for this text. To translate this text, type its translation in between the quotes like this:

6.1.0

Repeat this process for every text you want to translate.

Step 7 – Save package: after you’re done, save changes and close the file.

Step 8 – Refresh browser: refresh your browser to see the changes.

8.1.0

As you can see from the picture above, we’ve translated the entire Administrar agentes panel from the Admin tab.

So, this is it for this post. I hope this is of utility for you and your company, specially if your native language is not english. 

See you on the next one, but before I leave, here’s a quote from Geoffrey Willans, an english author and journalist, about languages:

You can never understand one language until you understand at least two.
‒Geoffrey Willans

OTRS Queues, Groups, Roles and Agent Creation

For this post we’re going to explore the basics of OTRS and how to start making configurations for specific use.

OTRS has 5 basic elements for its functionality. These are:

  • Tickets: these are the main element of OTRS. A ticket is a request or problem that a customer makes or reports. They’re the mean on which customers interact with the people of the organization. All of the interactions are saved and archived. 
  • Queues: they are the holders of tickets. You can create as many queues as you’d like in order to assing tickets to queues according to business criteria. 
  • Groups: these are sets of permissions for the queues.
  • Roles: this element is optional, yet I like to see it as mandatory. Roles are assigned to groups, so they’re as well a set of permissions. But what’s the difference? When you want to give permissions to an agent, you can either assign an agent to a group or to a role. The difference is that if you don’t have roles and want to change the permissions to a group of agents, you’ll have to change those permissions individually for each agent. If you have agents assigned to a role, you’ll just have to change their role to another one that has the permissions you need them to have.
  • Agents: these are the people that login and attend all of the tickets, as well as the administrator of the system. Agents can also have multiple roles.

Getting started

Before we get started with creating all of the elements, please note that queues, roles and groups are dependent to your organization. This means that the elements I create in this post, shouldn’t be the same for your company and that before creating them, you should study your business’ processes in order to make an effective configuration of OTRS.

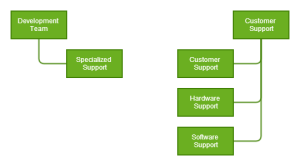
For this post I’m going to make up an organization that sells a electronic components with their own software. The basic structure would be something similar to this:

structure


There’s the Customer Support Department, and the Development Department. There’s of course more roles like supervisers and all of that, but I just omitted them for this post’s scope.

The Customer Support Department, has 3 Customer Support Groups: the Customer Support group, the Hardware Support Group and the Software Support Group. The Customer Support will handle all the requests that customers have regarding everything (problems or simple questions). If they can’t solve it because it’s out of their knowledge reach, then, according to the problem (software or hardware) they elevate the issue to the support team that has more knowledge on the subject. If they can’t solve it, and this should be very in very few ocasions, they elevate the ticket to the Development Team and they should know how to resolve the issue; if they can’t resolve the issue, then they file a bug report.

Here’s a simple diagram for the process created using the BPMN notation (This is a interesting topic to check on. I’ll probably make a post about this later.):

process


After defining the process, let’s define the queues, groups and roles we’re going to use in OTRS, but first, let’s analyze the permissions available in OTRS. In the following picture, there’s a description for all of them:

permissions


As you can see in the picture, the permissions are self-explanatory so I won’t get into details over this. For the post’s purpose, I’m going to define the permissions for each group and queue. For this we have to analyze the process flow and the organizational structure. In the structure, we defined 4 types of support, so there’s going to be a queue for each type of support.

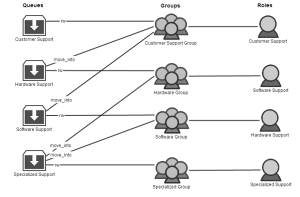
After defining the queues, we have to define the groups of permissions for the different queues. I like to name it the same as the queue, on which it has major permissions. So, in this case we’re going to define 4 groups and 4 roles as well:

map

This is a very example of a Queue-Group-Role map. More effort should be put in order to define owners and limit the permissions even more, specially in big organizations, but for this post’s scope, this does the job.

Now that everything is defined, let’s see how to represent it in OTRS.

Step 1 – Login: login as an Admin user. 

Step 2 – Administration View: Press the Admin button in the navigation bar.

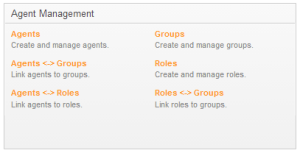
Step 3 – Group Creation: In the Agent Management Panel, press the Groups button. This panel will be mentioned a lot in this post so don’t forget about it.

3.0.0

3.1 – New Group: In this page, you should see a list of all created groups. If this is a fresh installation, then you should see the users, admin and stats groups. If you have ITSM installed then you see some more. To create a new group, press the Add Group button in the Actions panel to the left.

3.1.0

3.2 – Filling Group Form: this is the form for creating a new group. It’s very straightforward. Go ahead and fill it with the information of your group. The Validity entry means if the group is valid or not. Groups can not be permanently deleted, so setting the Validity to Invalid would be the equivalent of deleting a group. After finishing press the Submit button. 

3.2.0

3.3 – Agent-Group Relations: after creating a new group, you’ll be prompted with assigning new agents to groups. Leave it blank and then press submit.

3.3.0

This is everything you need to create a group. Repeat this process for all groups you defined.

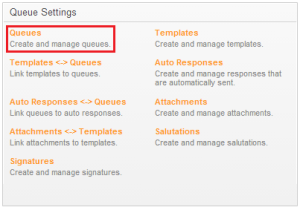
Step 4 – Queue Creation: go back to the Admin tab, and look for the Queue Settings Panel. Press the Queues button.

4.0.0

4.1 – New Queue: in this page, you should see a list of all queues. If this is a fresh installation, then you should see the RawJunk, Postmaster and Misk queues. To create a new queue, press the Add Queue button in the Actions panel to the left.

4.1.0

4.2 – Filling Queue Form: this is the form for creating a new queue. It’s very straightforward. Go ahead and fill it with the information of your queue. The Validity entry means if the queue is valid or not. Queues can not be permanently deleted, so setting the Validity to Invalid would be the equivalent of deleting a queue. Note that there is a Group field and a Subqueue field. The Group field will be the default group for the queue, so make sure you choose the correct group and the Subqueue field is the parent queue of the new queue. You can leave this field blank.

Other important fields are the Salutation and Signature fields. In OTRS you define templates so that every tickets has certain structure and standarization. In this fields, you choose the template for the Salutation and Signature. In this example we’ll use the default one. In a later post I’m going to write about making new templates.

Press Submit after you’re done filling the form.

4.3 – Template-Relations: after hitting the Submit button, you’ll be redirected to a Template-Queue page. In this page you define the answer templates associated to the queue. You can have predefined answers to known problems or questions. You need to have at least one associated template to a queue in order to define tickets. Make sure you choose at least one.

Then hit the Submit button.

4.3.0

This is everything you need to create a queue. Repeat this process for all queues you defined.

Step 5 – Role Creation: go back to the Admin tab, and in the Agent Management panel press the Roles button.

5.1 – New Role: in this page, you should see a list of all roles. If this is a fresh installation, then you should see no roles created. To create a new role, press the Add Role button in the Actions panel to the left.

5.1.0

5.2 – Filling Role Form: this is the form for creating a new role. It’s very straightforward. Go ahead and fill it with the information of your queue. The Validity entry means if the role is valid or not. Roles can not be permanently deleted, so setting the Validity to Invalid would be the equivalent of deleting a role. After finishing press the Submit button.

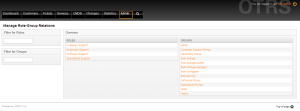
Step 6 – Role-Group association: go back to the Admin tab and press the Roles <-> Groups button in the Agent Management panel. This will redirect you to the following page: 

6.0.0

Click one of the roles you created. 

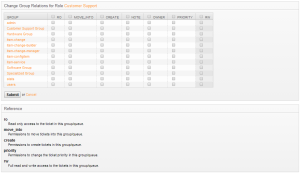
6.1 – Permissions: to assign the permissions you defined, you’ll see the following view:

6.1.0

Check the permissions according to what you defined and press Submit. 

6.1.1

Step 7 – Agent Creation: go back to the Admin tab, and in the Agent Management panel press the Agents button.

7.1 – New Agent: in this page, you should see a list of all agents. If this is a fresh installation, then you should see root@localhost and the admin user if you created one. To create a new agent press the Add Agent button in the Actions panel to the left.

7.2 – Filling Agent Form: this is the form for creating a new agent. It’s very straightforward. Go ahead and fill it with the information of your agent. After finishing press the Submit button.

7.3 – Agent-Group Relations: after creating a new agent, you’ll be prompted with assigning the agent to groups. Leave it blank and then press submit.

Step 8 – Role-Agent association: go back to the Admin tab and press the Agents <-> Roles button in the Agent Management panel. This will redirect you to the following page: 

8.0.0

Click one of the agents you created. 

8.1 – Role: to assign a role you defined to the agent you selected, you’ll see the following view:

8.1.0

Check the roles according to the agent you selected and press Submit.

8.1.1

Your agent now has role(s), and therefore permissions to the queues you associated the role with. 

This is it for the queue, group, role and agent creation. Repeat all of the processes in order to make all the queues, groups, roles and agents you defined for your organization. I hope this helped you understand a little bit better the basics of OTRS.

See you in the next post!

OTRS ITSM Module Installation

In this post we’re going to install the ITSM module for OTRS. First off, let’s start talking about what ITSM really is and a little bit about ITIL, the reference for ITSM best practices the module is based on.

About ITSM

Nowadays, it’s really hard to imagine a business or organization that doesn’t use any kind of information technology for it’s daily operations. This means IT has become one of the major means for completing activities and processes within organizations. This allows companies to optimize processes since computers are much more efficient than humans for certain tasks. Please note that this doesn’t mean that people is no longer necessary and that they should be fired. On the contrary, this grants great opportunities for the organization since the human effort replaced by computers, can now be used to make other tasks that could add greater value to the business. The problem is that IT can get hard to manage, specially in big companies and that’s why the ITSM (Information Technology Service Management) discipline emerged.

For a better understanding of the concept, ITSM, according to the Information Technology Infrastructure Library (ITIL), is 

The implementation and management of quality IT services that meet the needs of the
business. IT service management is performed by IT service providers through an appropriate mix of people, process and information technology.

I highlighted those phrases to make special emphasis that:

  • IT must be of utility and add value to the business.
  • IT service providers can be external (contracted service provider) or internal (IT Department) to the organization. 

Why do I tell this in an OTRS ITSM Module installation post? Because it’s never bad to learn new things and the background of why software like this is made. ITIL is a very vast and interesting reference that everyone that works in the IT business should know of to really understand the value IT can give to the organization and how to effectively deliver that value. Also, because IT guys, no matter what role they play (technician, developer, network specialist, database specialist, and so on), they all must know what are they really doing and why the business needs their work to get done quickly and effectively. And even better so they could also give improvement ideas for the end users or decision-making people that could lead to a more efficient organization, consequently getting better results and making the IT department more valuable to the company.

Enough said about ITSM, let’s start the module for OTRS installation.

Step 1 – Download OTRS: go to this link, look for the Windows Installer and download it. As you can see, there are lots of options here: 

  • ITSM Bundle
  • General Catalog
  • Change Management Module
  • Core
  • Incident Problem Management Module
  • Service Level Management Module
  • Import/Export

Some modules are specific for some ITIL processes, while some are packages needed in order to run the other modules. You can install them individually one by one (General Catalog and Core must be installed first and in that order and then the other modules you need), or you can just install the bundle and everything gets installed. For this tutorial we’re going to install the bundle, but the process for individual module installations is the same.

Step 2 – Install the module:

2.1 – Login: login as an Admin user

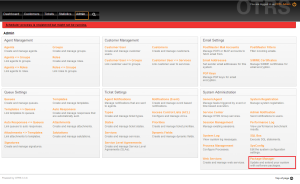
2.2 – Package Manager: In the Admin, press Package Manager button in the Administration Panel

Package Manager

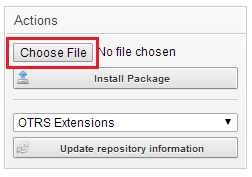
2.3 – Choosing File: In the Package Manager view, press the Choose File button in the Actions panel to the left of the screen.

2.1

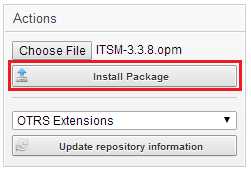
This will open a Browse Window. Look for the .opm file you downloaded from the link above and choose it. After that, you will see the name of the file next to the Choose File button. Press the Install Package to start the installation.

2.2

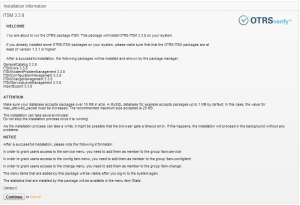
2.4 – Installation Summary: After pressing Install Package OTRS is going to analyze the file you chose. After analyzing you’ll see a new panel to the right labeled Installation Information. This panel should look something like this:

3.0

Press Continue to start the installation. This will probably take more than five or ten minutes with no progress bar so be patient. After a while it may throw you a 504 Gateway Time-out error. Just reload and wait for the server to give you back a response, it may take a while again, so be patient. Once you see the response the ITSM module is installed.

Repeat steps 2.3 and 2.4 if you’re installing modules individually.

Step 3 – Group assignation: You now got the response, but why is there nothing new? Because you haven’t assigned permissions to the user to see all of the new features.

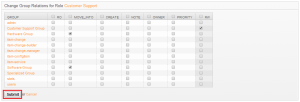
3.1 – Getting to Agent management: For this you’ll have to grant the user permissions to the groups. I’m going to get into more detail in a next post of what is this group assignation really and how to achieve this correctly. For now, go to the Admin tab. Press the Agents <-> Groups button in the Agent-Management panel. 
4.0

You’ll see a view similar to this one:
4.1

3.2 – Choosing the admin user: In the Agents panel, press your Admin user. You’ll now be redirected to the following page:

4.2

3.3 – Granting permissions: Now, check the upper RW box to grant permissions on everything. The table should then look like this if you haven’t made any configurations to the OTRS installation yet:

4.3

3.4 – Refreshing the UI: so you now assigned the permissions, but sill nothing new, right? Logout and then login back again. You should now see that there are more options in the navigation bar on the top of the screen. Something like this;

5.0

So, this is it for the ITSM Module installation. This new options all correspond to certain processes defined within the best practices of ITIL so you can either modify OTRS to match your company’s method of managing services or you can start adopting ITIL best practices in your organization in order to make a better use of OTRS and the ITSM module.

I hope this simple tutorial helped you install the ITSM module and that you got interested on investigating more about ITIL. It’s a great plus to you as an IT person, whether you are a developer, an analyst or a consultant.


First Post

So, this is my first post for the apprenticeship program at Pernix, a software development company located in San José, Costa Rica. They primarily develop web applications for US customers, but they also make OTRS Help Desk and SugarCRM implementations in the area. I got this opportunity because I saw a post that they were looking for college students that wanted to learn in a real work environment, so I applied. In my opinion, this is a nice program to promote because lots and lots of employers look for people with experience, and for newly graduated college students without any experience, this task may get hard. Another great thing about this program is that it not only teaches about software-related things, but it also makes you to practice english language and soft-skills.

I am an IT Management student and I’m currently in the 4th of 5 years of carreer. Since my carreer it’s not all about programming, I won’t be learning about the web application development technologies the business uses, instead I’m going to start learning the OTRS Help Desk for now and then see what comes next. My goal is to post several tutorials and information about this tool.

Overall, I am really excited about this opportunity because I’ve always wanted to have a little approach into the business world and this is the perfect chance for this. I hope I learn a lot from this experience and that it contributes to my professional development.

I’m going to finish this with a quote that is posted in the wall at Pernix:

Learning is not a product of schooling but the lifelong attempt to acquire it. Albert Einstein