For my first actual post, I’m going to make a tutorial on how to install OTRS in Windows. Linux installation tutorial will most likely come in the future.
About OTRS
OTRS is an Open Source Ticket Request System. This kind of software is great for handling trouble tickets of every kind within or outside an organization. You can see tickets as requests from internal collaborators such as employers of a department asking for air conditioning maintenance to the maintenance department, or a customer that asks for support or making a complain.
What the system allows is to manage all this incoming requests in different categories (queues in OTRS) and it also makes it possible a complete tracking of the tickets. A person can see all the communication necessary for resolving a ticket, it’s state, it’s owner and responsible and every possible information you can imagine. The system also permits for the administrator to create roles and responsibilities to different queues and the hability to assign agents to those roles. This allows administrators to mantain the information secure and visible only to the people that are meant to see that information.
Another feature of OTRS is that it is highly customizable as it is Open Source and configurable as well. There are lots and lots of options varying from telling the system what fields of tickets to show and which ones to hide; to customizing the GUI to create filters for incoming mail from customers to automatically assign to a queue or just delete them if they’re spam.
There is also an option for adding third-party modules, such as ITSM (Information Technology Service Management) module meant to aid in ITSM activities and processes. This module is ITIL (Information Technology Infrastructure Library) certified and I’ll talk about it more later in this post.
OTRS Windows Installation with PostgreSQL
Installing OTRS in Windows is actually very simple, as you would expect in a Windows environment. Here’s a step by step guide:
Step 1 – Download OTRS: go to this link, look for the Windows Installer and download it.
Step 2 – Install OTRS: go to the directory where OTRS installer was downloaded and execute it.
2.1 – Choosing installation language: choose the installation language you feel more comfortable with. This language will not be the final installation language. Hit Ok and then press Next.
2.2 – Choosing Perl version: OTRS is written in Perl and you can choose whether using ActiveState Perl or the bundled version of Perl. I tried installing it with ActiveState since the installer said it has a better performance than the bundled one, but I run into some issues which I could not resolve, so for this tutorial i’ll be using the bundled version. This said, hit Next to continue with the installation.
2.3 – Destination Folder: choose the folder where you want to install OTRS and hit Next.
2.4 – Database Selection: this is an important step. For this tutorial we’re going to use an already installed version of PostgreSQL, so I’m going to choose Use an already installed databse option. If you don’t have PostgreSQL you can install it if you want to, but it’s not necessary. You can choose the Install the bundled MySQL database option with no negative impact with the installation. Going this way is very straightforward and less complicated so choose what suits you best. Hit Next and then Install to continue.
2.5 – Installation: OTRS is now installing and wait a few minutes. After it’s finished hit Launch to continue.
Step 3 – OTRS Initial Configuration: after hitting Launch button a new window will open in your default browser with a look similar to this:
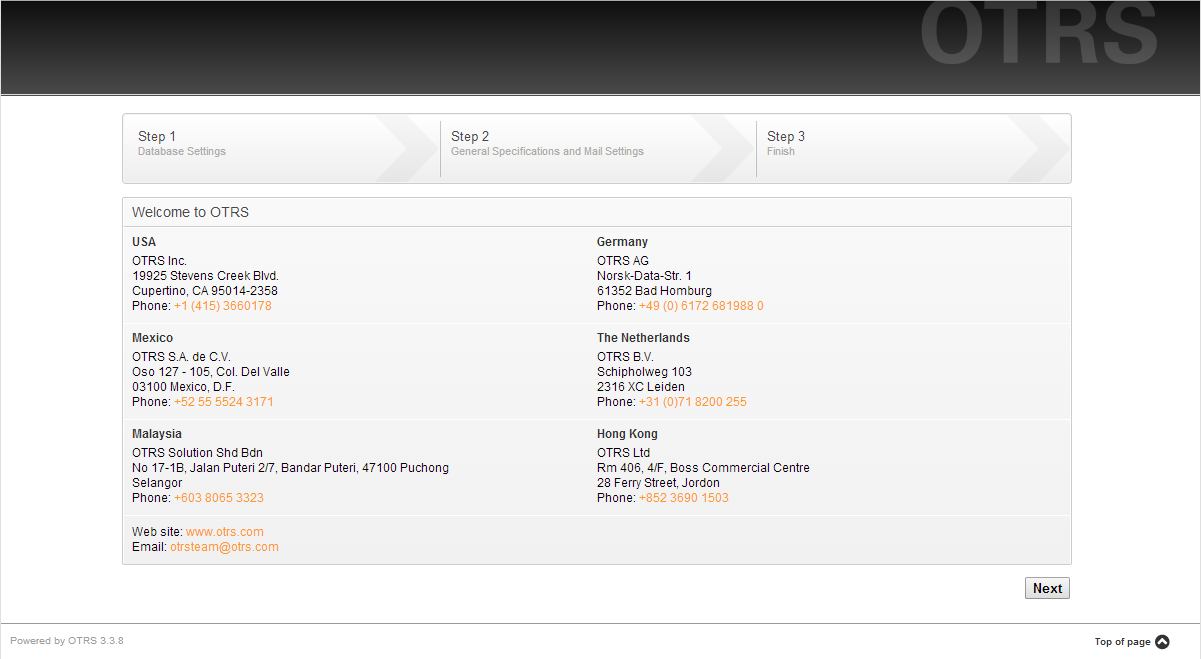
Hit the Next button and continue.
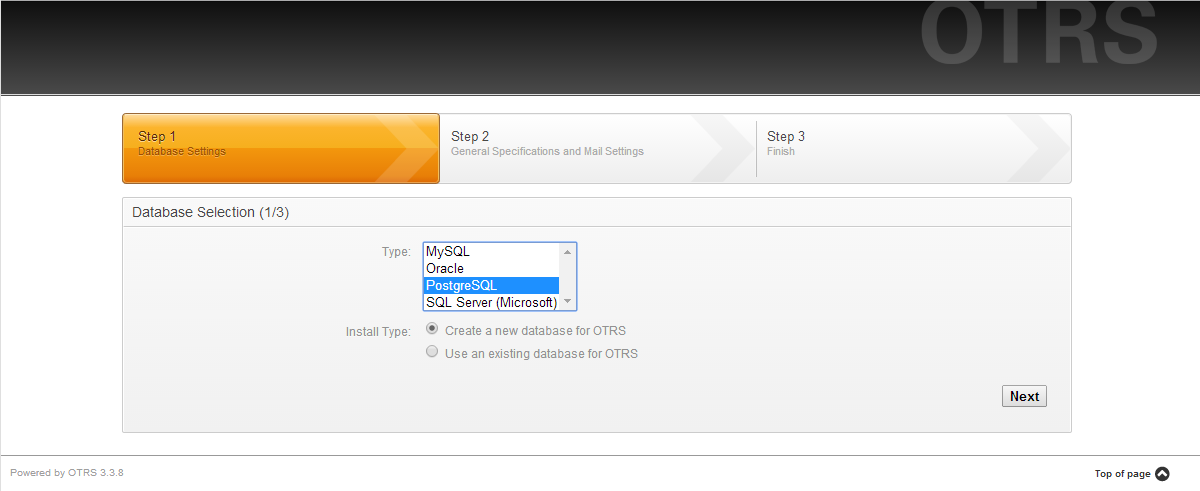
3.1 – Database Selection: in this step you’re going to select the database engine you have installed.
Note: if you chose to install with the bundled MySQL database these steps will be slightly different for you. From Step 3.3 everything should be the same again.
In this case, I’m going to choose PostgreSQL and the option Create a new database for OTRS and then hit Next.
3.2 – Connection Settings: in this step, OTRS is going to ask for your database user credentials and the host of the connection. Make sure you put the credentials of a user with CREATE DATABASE permissions and then hit Check Database Settings.
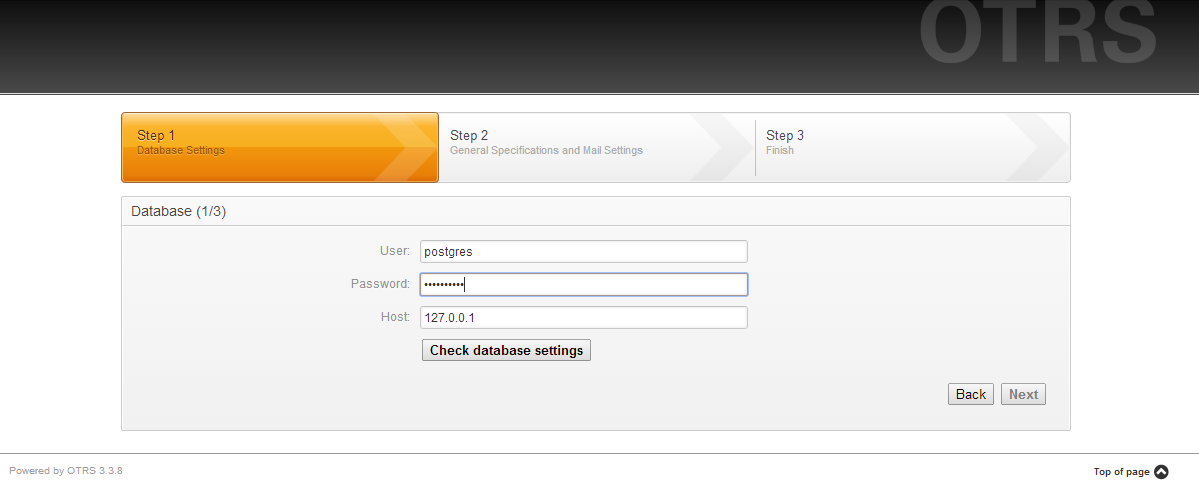
If the connection was successful you’ll get a new set of fields. These correspond to the database that OTRS will be using, so feel free to change them however you want. For this post’s purpose I’m going to be using otrsTutorial for the database and OTRS_Tut_User for the master user. Make sure you change the password to something you are more likely to remember or take note on the auto-generated password and then hit Next. This step might take a little while since the database will now be created.
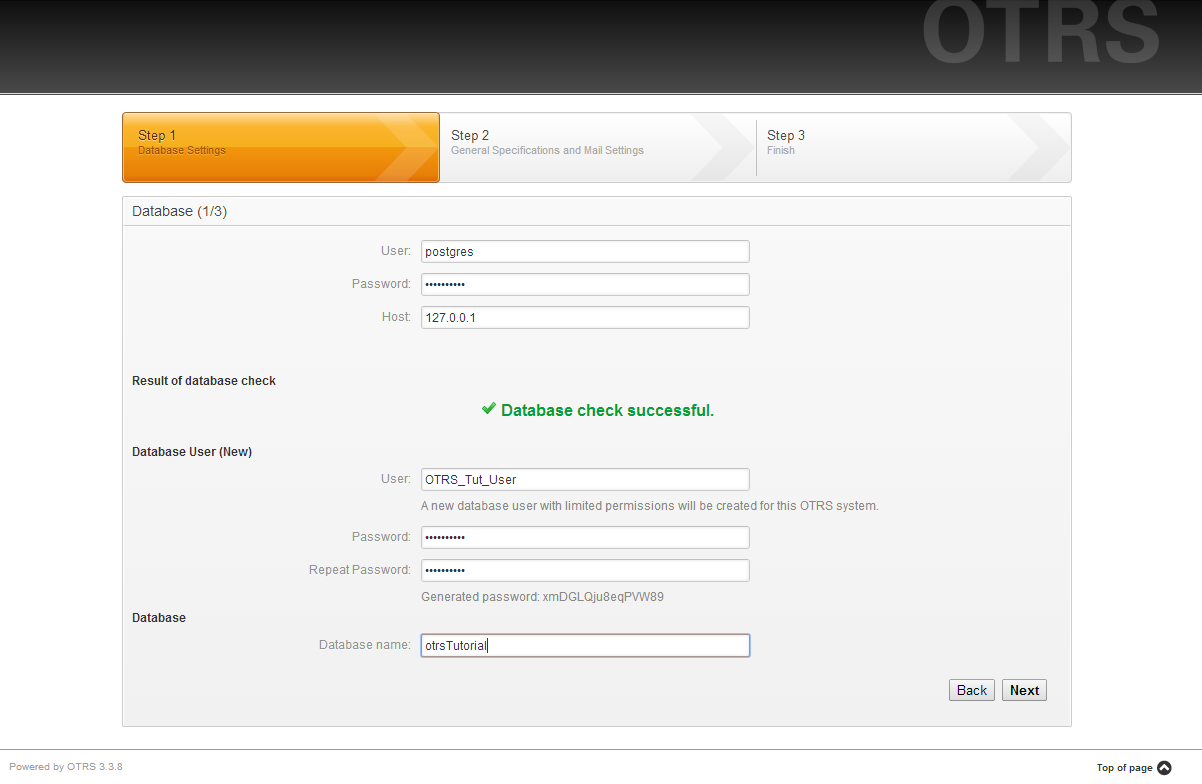
After the database was succesfully configured, you’ll get this window:
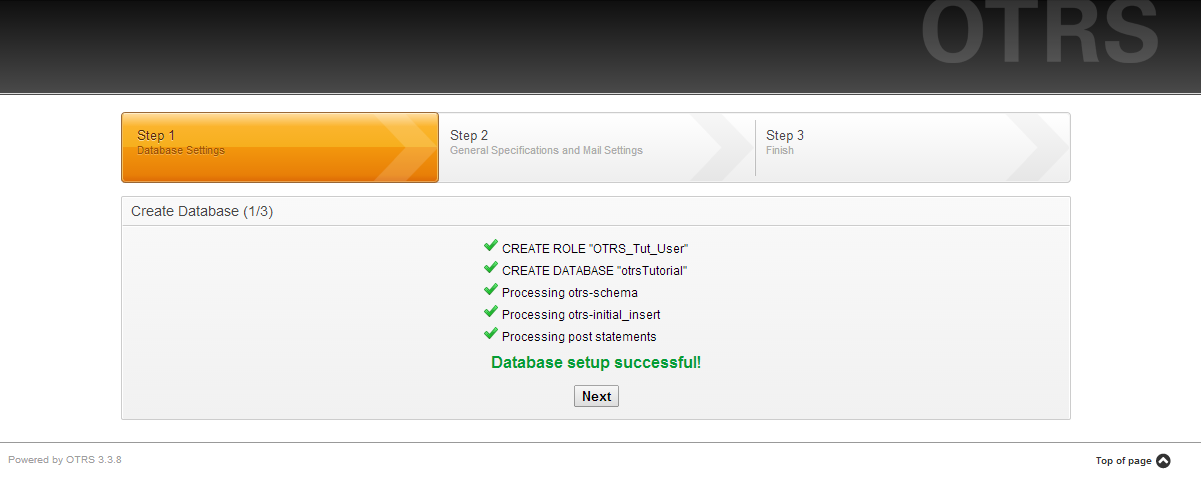
Hit Next to continue.
3.3 – General settings: in this step you’ll be asked for some information.
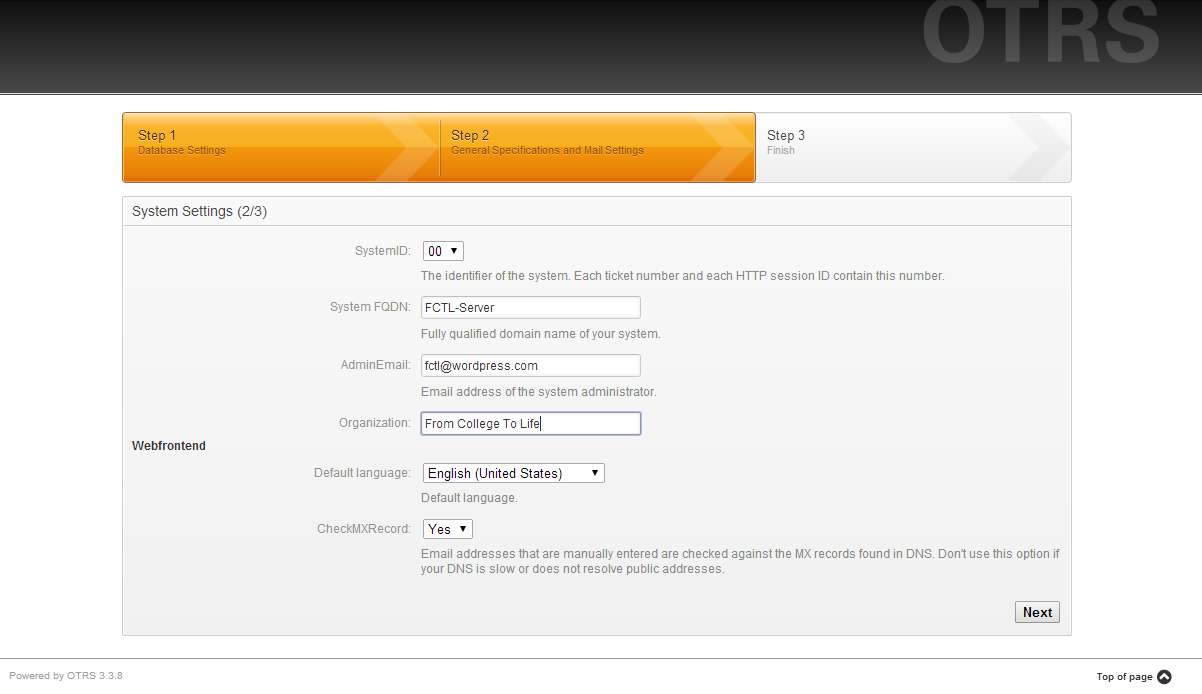
SystemID: just change it to whatever you like best, but if you have multiple installations it’s better for them to be different.
System FQDN: put the name the domain name of the system you’re installing OTRS. It is generally filled by default.
AdminEmail: fill it with the administrator email.
Organization: put the name of your organization.
Default language: this will be the default language. This does not change the administrator’s frontend language automatically. We’re going to change that later in this post.
CheckMXRecord: this has to do with mail redirection. Choose No if your DNS server is slow.
Hit Next to continue.
3.4 – Email Settings: this is the last step of the installation. In here you’ll configure the email the system is going to be using. For this tutorial I’m going to use Gmail SMTP and POP hosting. The image will be self explanatory on how the configuration should be.
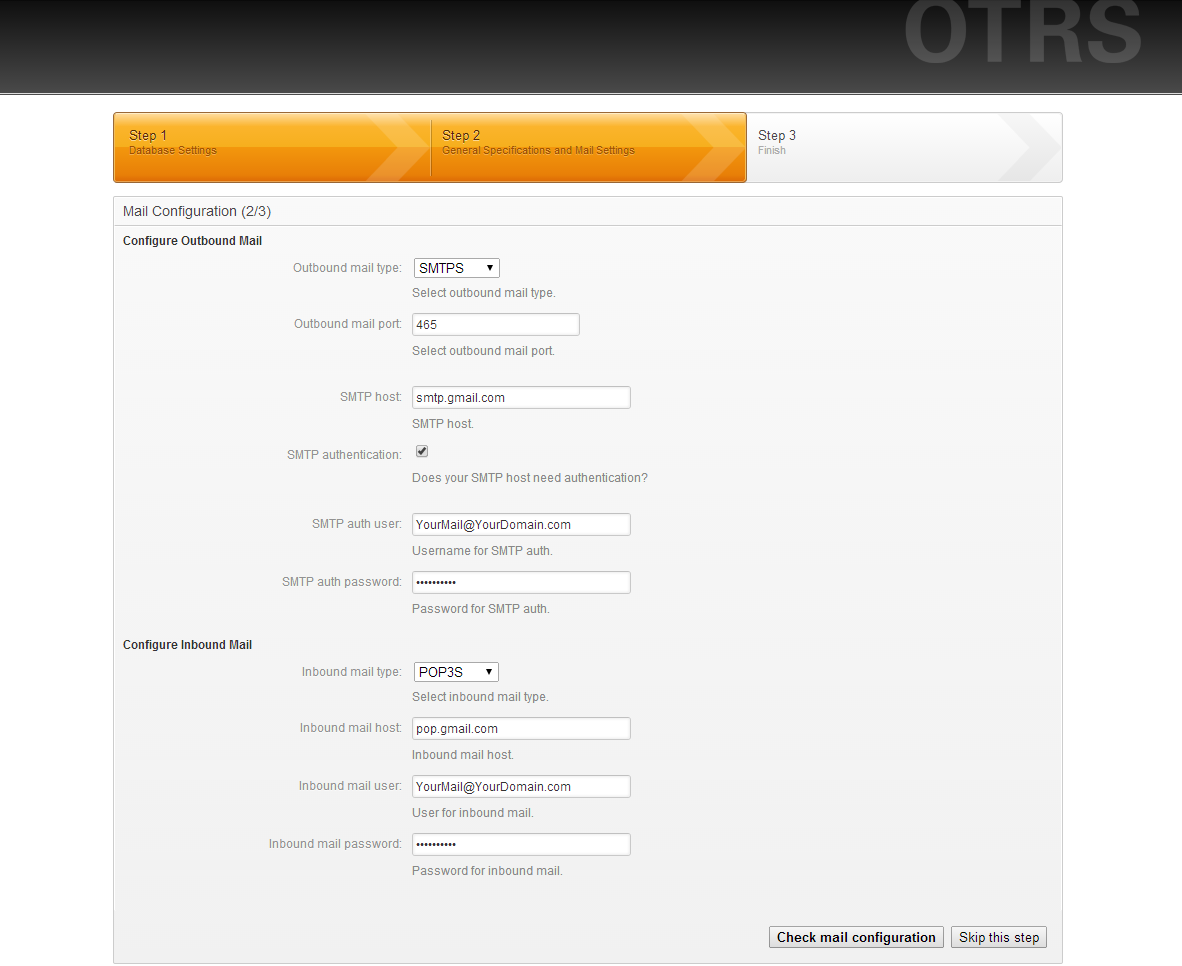
Outbound and Inbound mail type and host should stay the same as well as the port if you’re using Gmail, so don’t change them unless you’re completely certain of what you’re doing. For the user authentication, make sure you put your entire mail address, even if it ends with @gmail.com.
If you’re using another mail host, make sure you follow their instructions on how POP and SMTP configuration should be in order to work.
Once you’re done with that, hit the Check mail configuration button to check the configuration is correct. It if is correct you’ll advance the installation automatically.
Step 4 – Admin configuration: you’ll now be prompted with a Finished view. Go the Start page link it shows and login with the root@localhost user and the generated password.
4.1 – Login successful: one you’re logged in. You’ll see this window:

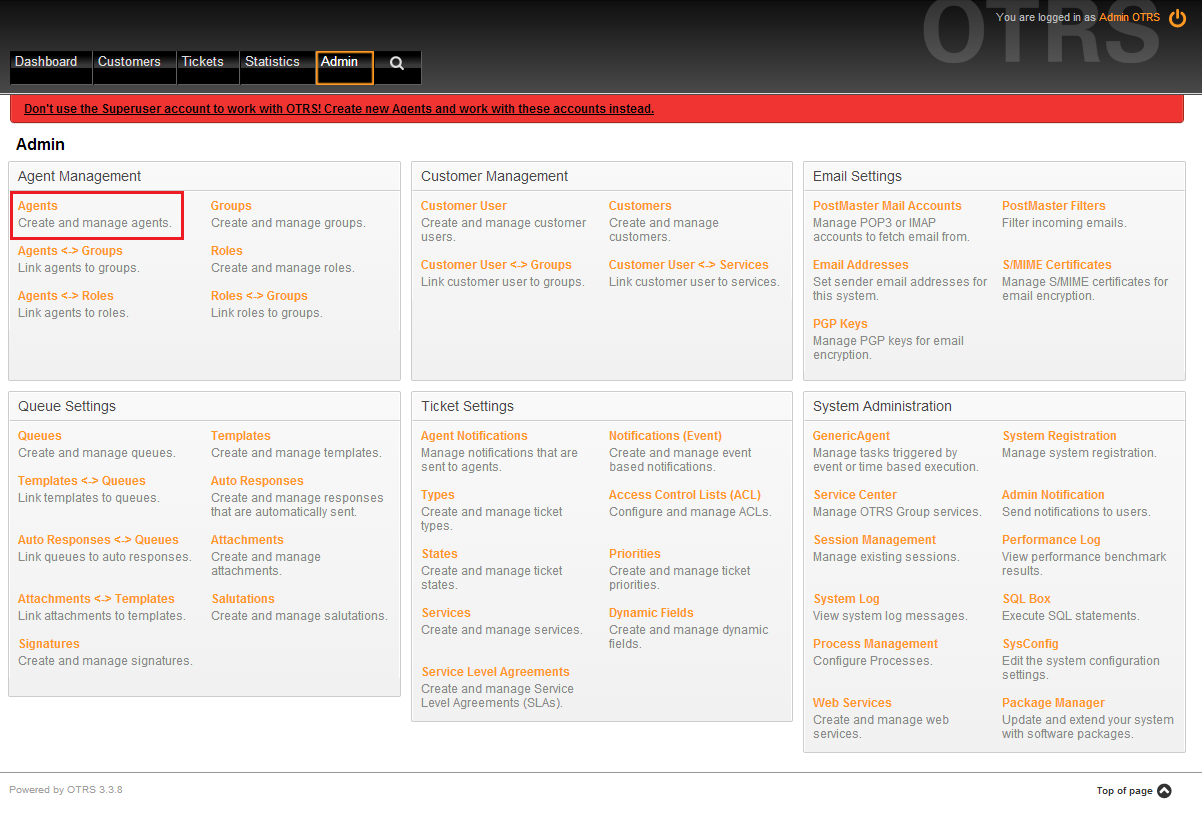
This is the main view of OTRS. Here you can see information about tickets, but we’re get into that later. For now, focus on the red message. To avoid this message, we’re going to make a new user with Admin privileges.
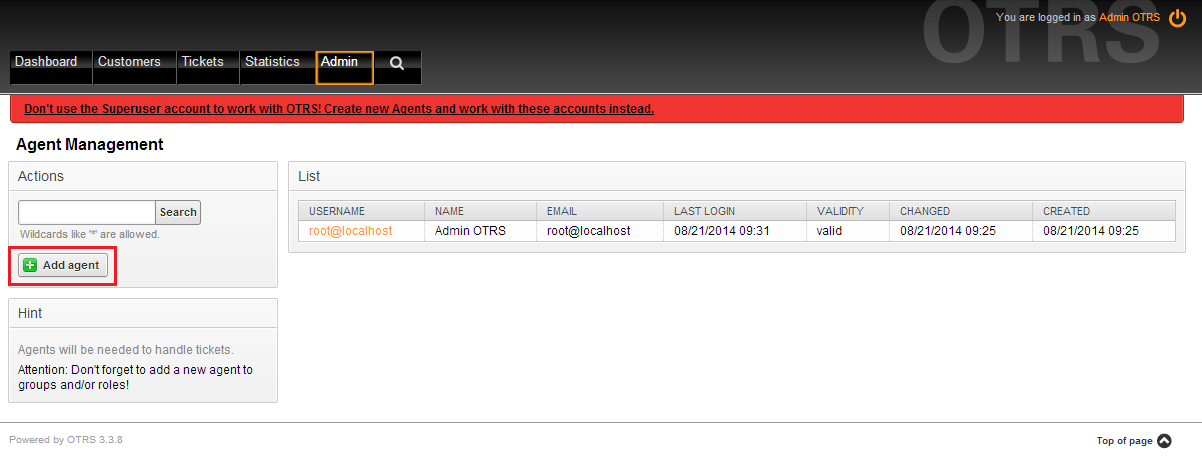
4.2 – Creating new Admin user: press the Admin button in the upper left side of the screen. You’ll get redirected to the Admin panel. In here, press the Agents button as shown below.
You’ll now see this view. Hit the Add agent button:
You’ll now be prompted with a form. It’s a bit long so I won’t post a picture, but the basics are simple. Fill the user with the information you consider necessary, but make sure to fill every field with a *, since they’re a must. In here you can set the language of the user’s GUI. The user can later change this if he desires. There’s a bunch of important information you can put in here so make sure you take your time to analyze all of this fields and see what is relevant to fill for your organization. After you’re done hit Submit.
4.3 – Group Relations: after the agent is created, you’ll be prompted with this window:
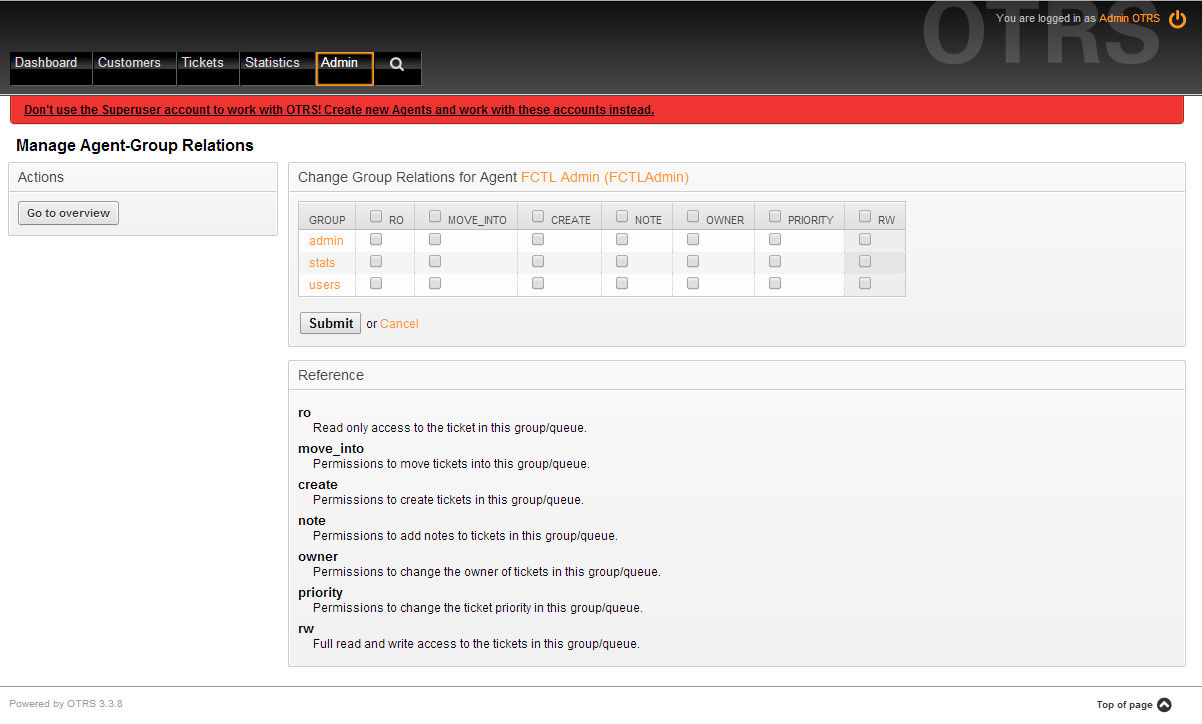
This group relations might look confusing, but we’ll get into more details in another post. To grant all permissions to the new user, check the top RW box. the table should now look like this:
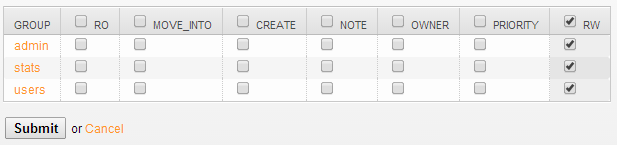
Hit the Submit button to finish. Afer this you’ll be redirected to the agents view and you whould see your new user there.
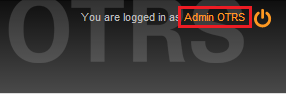
4.4 – Changing root password: to get to the current user management view, go to the upper right corner and hit the name of the user. In this case it’s Admin OTRS since we’re using the Superuser.
This will open the following view:
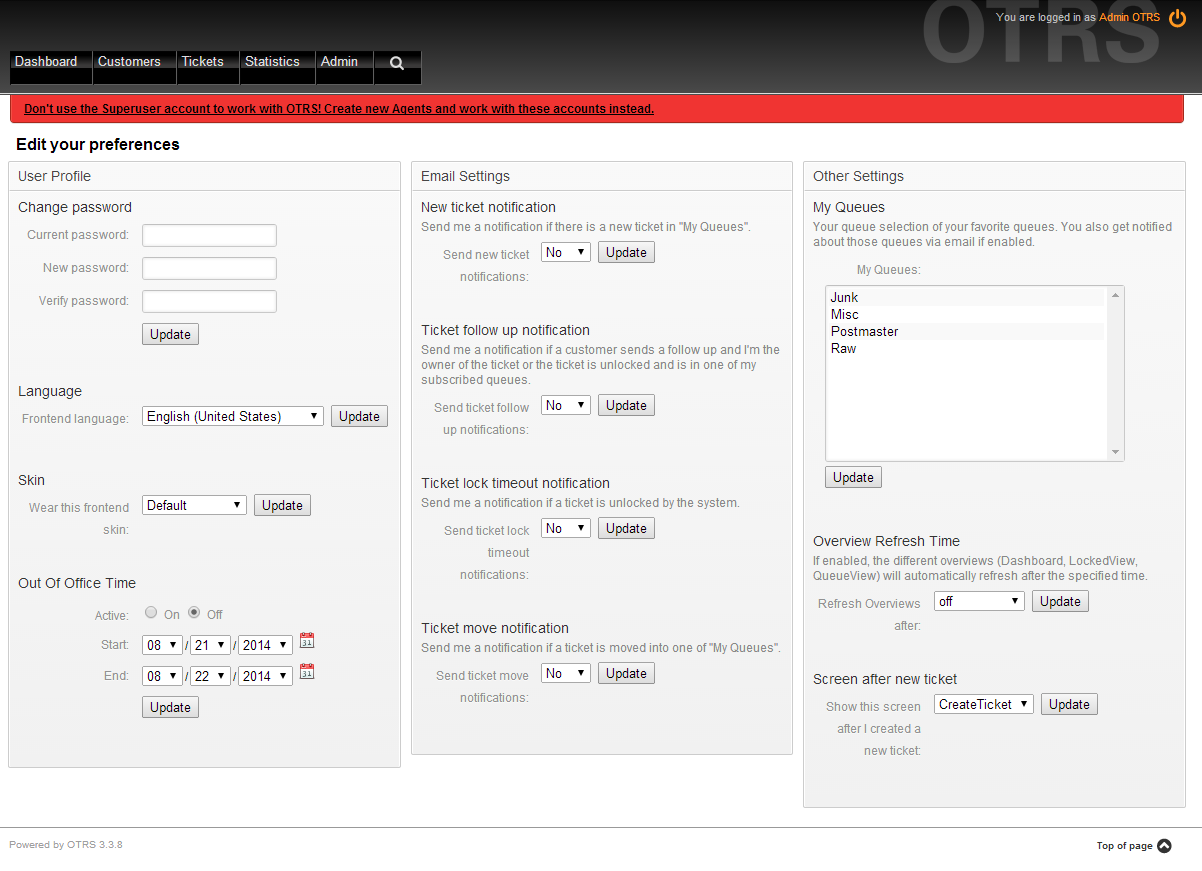
Here you can change the password by putting your Current password and the New password, and then pressing Update.
Also, you can change the language, the skin, office schedule, notifications and some other settings. Make sure to explore this panel to see if there’s something of value for your organization.
Step 5 – Logging out: after changing password, you might want to now login with your new Admin user. To Logout press icon next to Admin OTRS label in the upper right corner.

This will prompt you to the Login page and you can now login with your credentials.
And we’re done! This is everything for OTRS basic installation in Windows using an external database.
My next post is going to be about installing the ITSM module.
Reference for the Gmail configuration: http://wiki.otterhub.org/index.php?title=Configure_OTRS_with_Gmail
